Winter brings its share of beautiful snowy landscapes, but it also ushers in treacherous icy conditions that can make roads, driveways, and pathways hazardous. Spreading rock salt is a simple yet highly effective way to combat ice and snow, ensuring safety during winter. However, spreading rock salt properly is essential to maximise its effectiveness and avoid unnecessary waste or damage to surfaces and plants.
In this guide, we’ll guide you through the process of spreading rock salt efficiently and safely to keep your property free of ice this winter.
Checklist:
- Rock Salt - available in handy bags or bulk
- Snow Shovel
- Grit Bin
- Heavy Duty Spreader (optional but really handy!)
Why Use Rock Salt?
Rock salt lowers the freezing point of water, preventing ice from forming and melting existing snow and ice on surfaces. It's a popular choice for de-icing because it is effective, affordable, and easy to apply.
At Dandy's we stock three types of Rock Salt for various uses:
- Brown Rock Salt - traditional salt, the same as the Council uses on roads and pathways.
- White Rock Salt - preferred by schools and hospitals as it will melt down completely and leave no clay residue.
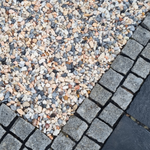
- UltraGrip Rock Salt - exclusive blended road grit, UltraGrip is grittier than normal brown or white rock salt - so leaves behind some teeny 1 - 6mm stone but lasts longer and provides extra good grip, whilst also effectively melting snow and ice. After the snow and ice has melted simply sweep up the grit - or keep down for extra traction!
However, while rock salt is a winter staple, it’s important to use it responsibly to avoid damaging your environment or your property. Let’s dive into how to use it properly.
1. Prepping for Spreading Rock Salt
Before you start spreading rock salt, preparation is key. Here are some steps to help you get ready:
Check the Weather
It's most effective to spread salt just before the snow or freezing rain begins. Applying salt early helps prevent snow from compacting and forming a layer of ice. Keep an eye on the weather forecast to time it correctly. Spreading rock salt the night before means you can wake up with the peace of mind that you don't have to battle the ice before leaving the house!
Wear Protective Gear
While rock salt is generally safe, it can irritate your skin or eyes if handled improperly. Wear gloves, boots, and protective eyewear to avoid direct contact. Always wash your hands after handling.
Clean Your Surfaces
If possible, remove any loose snow or slush before spreading rock salt. Use a snow shovel to clear the surface, which allows the salt to make direct contact with the ice and speeds up the melting process.

2. How to Spread Rock Salt: The Right Way
Now that you’re prepped and ready, follow these steps to spread the salt effectively.
Step 1: Choose the Right Tool
You can spread rock salt manually, but using a tool designed for the job will save time and improve coverage. Consider the following options:
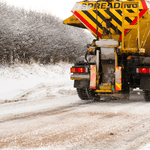
- Heavy Duty Spreaders: Best for larger areas like parking lots or long driveways. These work like seed spreaders, helping to evenly distribute the salt with minimal effort.
- Shovel Method: If you don’t have a spreader, you can use a shovel to scatter salt manually. Our snow shovels are light weight and the large head makes spreading salt quick and easy.

Step 2: Spread Evenly
Start at the top of your driveway, walkway, or road and work your way down. Spread the salt thinly and evenly to avoid clumping, which can cause over-salting in some areas and bare spots in others. As a rule of thumb, you need about 250grams of rock salt for every square metre of ice or snow.
- Tip: Avoid pouring excessive amounts in one spot. Salt works more effectively when spread out; too much salt can cause runoff that damages nearby plants or contaminates groundwater.
Step 3: Focus on Key Areas
Concentrate on high-traffic areas, such as paths, entrances and stairs. These spots are more prone to ice buildup and are critical for safety. If you're salting a driveway, pay extra attention to areas where vehicles will pass.
Step 4: Reapply as Needed
After heavy snowfall or if temperatures drop dramatically, you may need to reapply rock salt. Monitor the surface and reapply in thin layers if the snow begins to accumulate again or if ice reforms.
3. Post-Salt Clean-Up
Once the ice has melted and temperatures rise, it’s important to clean up excess salt to prevent damage to your driveway, yard, or nearby plants. Here’s how:
- Sweep Up Leftovers: Rock salt doesn’t evaporate, so once it’s done its job, sweep up any remnants to prevent salt buildup in your soil or garden, which can harm plants and grass.
- Rinse with Water: If possible, hose down the area to dilute any leftover salt. This step is particularly important if you have pets, as rock salt can irritate their paws.

4. Tips for Safe and Eco-Friendly Salt Use
While rock salt is effective, it can have harmful environmental effects if overused. Here are a few tips to reduce its impact:
- Use Sparingly: Don’t use more salt than necessary. A thin, even layer is enough to prevent ice buildup.
- Protect Your Landscape: If you’re salting near your yard, driveway edges, or garden beds, use barriers like tarps or salt-friendly products to minimise damage to plants.
Keep these tips in mind as you prepare for winter, and your driveway and pathways will stay safe, accessible, and ice-free.

